With those summer months fast approaching, the task of keeping your home cool is likely on your mind. Fitting your home with a new air conditioning unit is a simple and effective solution to this, but how long does it take? And what types of systems are there? In this guide, we cover everything you need to know about air conditioning installation. That way, you can make an informed decision that is right for your home, your budget and your schedule.
Furthermore, if you’re curious how much air conditioning installation costs, check out our guide. It covers what you can expect to pay for any given type of A/C.
Types of air conditioning units
Before we get into the process of air conditioning installation, we need to cover the different types of units you can buy.
In general, there are two forms of air conditioning that you can have fitted. These include:
- Portable units: These typically come in the form of small box like units that can be wheeled into the home. They can be refrigerative. This is where they cool the surrounding area by exchanging hot air from indoors with cool air outside. They also dehumidifying the air. Alternatively, they can work through an evaporative process.
- Split systems: As the name suggests, split systems work by have a two-part set-up of heat exchangers. Inside, an engineer will install an evaporative machine. Outside, they’ll then pair that with a condensing unit. Through this, the air conditioning can cool or heat the house as you so desire.
Under the umbrella of split systems belongs another kind – multi-split. The difference between split and multi-split is in the number of heat exchanger units that are installed. Split systems have one in each environment: outside and inside. Multi-split systems, however, often have one outside and multiple inside for variable temperature control.
You may also hear of central air conditioning units. These operate by cooling air in one space and then distributing it throughout the rest of the building.
The reason we haven’t listed them above is that the term has some overlap with split and multi-split systems. Both styles of air conditioning installation involve connecting internal units with external counterparts. In fact, some manufacturers even refer to split systems as a form of central A/C as vice versa.
While the installation process isn’t drastically different there are a few key differences, including the use of ducting. For more on this, read our Central Air Conditioning vs. Multi-Split System article.
Installing split system air conditioning
Split and multi-split systems are becoming increasingly popular air conditioning installations. Not only do they directly cool the areas and rooms you want them to, they are ductless. This means that, when you’re installing them, you don’t have to worry about any significant renovations or construction.
Instead, all you need to do is set up the internal and external units and then connect them with cabling. Of course, that’s a very general overview of the process. A more detailed view of this kind of air conditioning installation follows this kind of pattern:
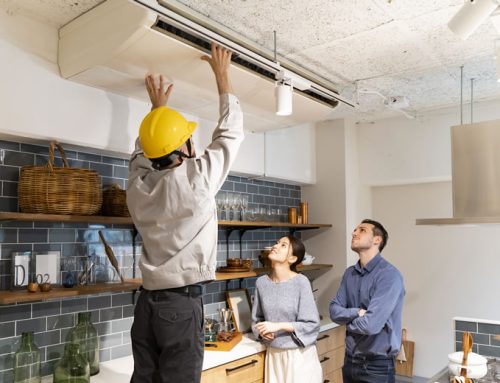
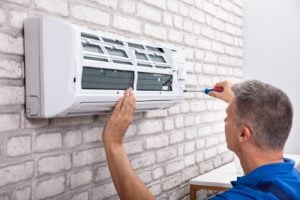
1. Installing the indoor evaporative heat exchanger
First, your installer will, with your help, decide on a suitable place to put the indoor unit. These must be attached to a wall and placed at least 7 feet from the floor. Additionally, A/C units must have between 6 and 12 inches of unobstructed space around them in all directions. This is to allow for sufficient airflow to and from the device.
Once this space is determined, an engineer will then fasten a mounting plate to the wall. This metal sheet will be between the unit itself and the wall to prevent any damages to either, as well as keep the unit secure.
After that, a hole will be created via circular drill near the air conditioning installation. It’s typically 3 inches in diameter, and this is done to give room for the cables to be passed through. You’ll have to check that wherever the mounting plate and hole are placed there are no pipes behind them.
A quick check is given to the internal electrics of the unit before the cables are piped through the hole and out to wherever the external unit will be. The unit itself is then fully fastened to the mounting plate.
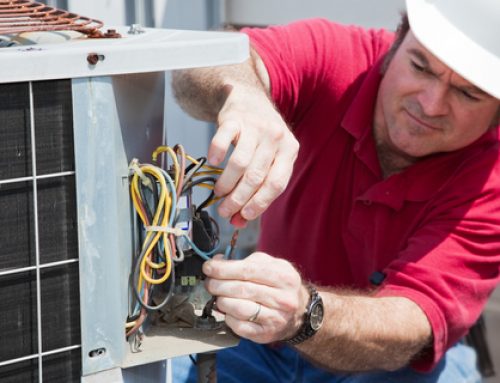
2. Installing the outdoor condensing unit
Much in the same vein as installing the indoor unit, the outdoor condenser must be positioned at least 12 inches away from a wall. It also, of course, must be installed near the hole that was drilled earlier. Additionally, whoever installs the unit will have to ensure it is not within 10 feet of a television or an antenna.
A concrete pad is placed on the ground to form a foundation for the unit. Natural ground can move and shift over time, so laying something firm is key. Oftentimes these will be raised too – to prevent any puddles from rain forming underneath the condenser.
Then comes the physical placement of the unit. The outdoor heat exchanger is fastened to the concrete using rubber pads or cushions. These will not only keep it in place, they will also reduce the vibrations of the machine.
Finally, the internal wiring is inspected before the cable that were run through the wall are connected with the external machine.
3. Final touches
A few last-minute checks and assurances are then made to the set-up to ensure its functionality and efficiency.
Professional installers will, at this point, bleed any humidity and air from the unit. This is usually found in the refrigerant section of the machine. If they don’t then the air conditioning installation will not operate properly and will feed in the wrong temperature of air to your home.
Any loose cabling is then covered in piping. This not only provides added protection from damage and rainwater, but also tidies everything up. Air conditioning installations might not be designed to be the most visually appealing. But small touches like these can at least make them look well cared for and professionally put together.
The very final step is for the installer to turn on the machine and check it’s working. If everything has been done correctly, your rooms should feel the sudden influx of cool air.
Installing portable air conditioning units
The actual installation process for portable air conditioners is very quick. You simply put bring them in, make a couple of adjustments, and turn them on! This is one of their only real benefit though unfortunately. The systems are often under-powered for the room you are looking to cool and leave the owner somewhat unhappy.
There are a few other downsides to a portable air conditioning unit which should be considered before purchase:
- You’ll need to find a way of venting your chosen air conditioning installation through a window. This means that wherever your unit is placed, it must be close to a window and nearby an electrical socket. The most technical this installation gets is in fitting the window adapter kit. Nearly all portable air conditioning units come with one of these. They look like plastic tubes, not unlike the compressible tubing of a hoover, and they connect from the machine and to your window. Specifically, the output end needs to be placed in a gap created by your window. If your windows open out on hinges, they may not be suitable for this type of unit. Instead, you need the kind of windows that slide upwards so that you can create a small gap. From there, you need insert the window adaptor into this open space. If it doesn’t fit, you may have to get a bit creative with your DIY skills.
- It can get very loud – Portable air conditioners have all their working parts right inside the same room where you eat or watch TV, so the noise level can easily be very disruptive. It’s possible to adjust settings to slow down the fan speed to improve this, or you could move the unit to the furthest corner if your electric cable or the exhaust pipe is long enough.
Get an air conditioning installation quote from us
By now you should be a veritable expert on the air conditioning installation process. You should know which type is best suited to your home and your needs.
All that’s left to do is to hire someone to install your ideal choice. Fill out the form below and we’ll get back in touch as soon as we can with a quote. Don’t miss out on having a cool home, or on our competitively priced, expertly conducted services!